
How to Build a DIY Golf Simulator Floor
Learn how to build a DIY golf simulator floor that ensures stability, realistic ball roll, and comfort for long practice sessions in your home golf setup.
SIMULATOR MATS
Golf Tech Buzz Editorial Team - Led by AJ “Buzz” Eichman
6/12/20267 min read
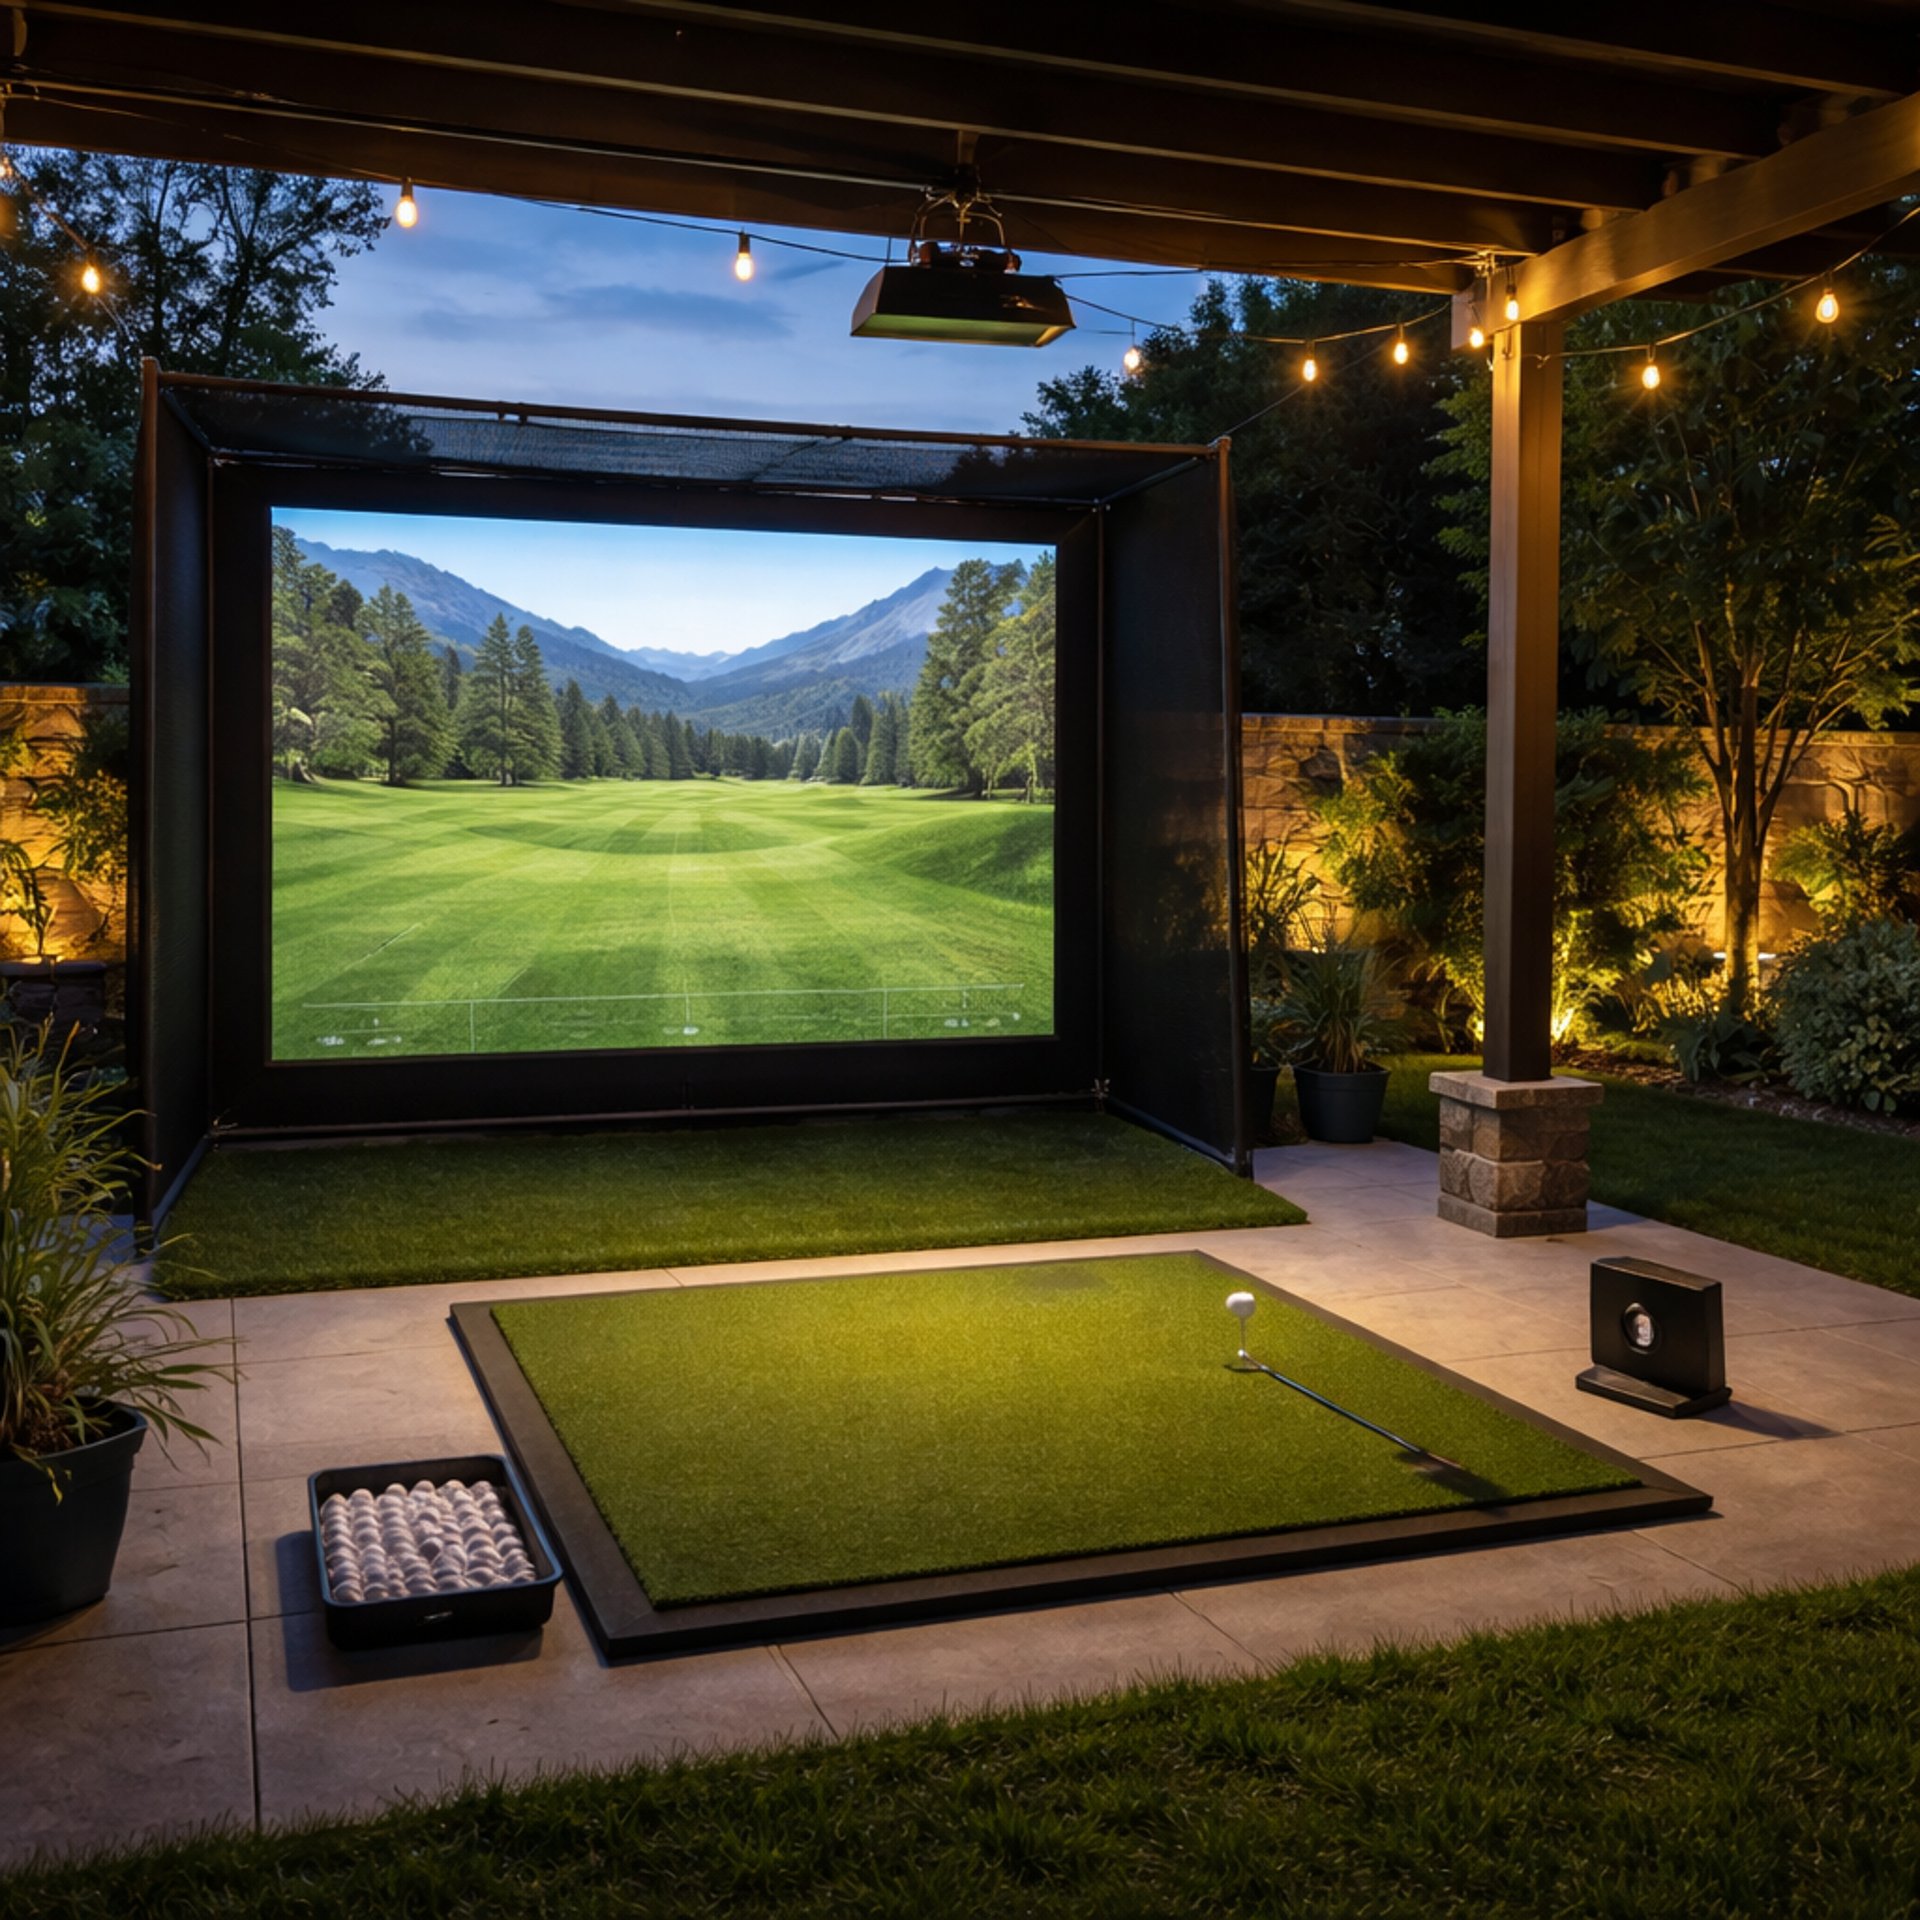
When it comes to setting up a home golf simulator, the flooring often gets overlooked. But let me be clear—what lies beneath your simulator mat and projector screen makes a huge difference. A well-built DIY golf simulator floor will provide stability, proper ball roll, and comfort during those long practice sessions. More importantly, it helps protect your hardware investment and your joints. I’ve installed more than my fair share of simulators over the last 25 years, and the setups that ignore flooring usually fail prematurely or frustrate users.
Getting your flooring right doesn’t require breaking the bank or installing a permanent, commercial-grade surface. It does require thinking through materials, subfloor prep, shock absorption, and space. If you want realistic ball physics and durable comfort for years, you’ll want to follow the practical tips below.
Before starting your build, it helps to understand how flooring fits into the bigger picture of Golf Simulators and the complete Golf Simulator Hitting Mat Guide.
Quick Verdict
A stable, level subfloor is the foundation of a great DIY golf simulator floor.
Materials like artificial turf over plywood or rubber mats offer the best balance of durability and ball roll accuracy.
Avoid overly soft or cushioned floors that distort ball behavior or cause foot instability.
Incorporate shock-absorbing layers to protect your joints without sacrificing firmness.

Understanding the Role of the Golf Simulator Floor
What actually matters here is that your simulator floor supports realistic performance and user movement without causing damage or discomfort. Unlike a real golf course, your indoor floor must hold up to repeated swings in a small area, offer the right roll for your golf balls, and provide a forgiving surface for footwork.
The floor acts as a base for all your simulator gear—projectors, nets, sensors—and the player. If it’s uneven or too soft, sensors won’t track correctly, mats will shift, and the ball flight can look off. A good golf simulator floor balances firmness with slight shock absorption to ease swings and foot pressure.
Many golfers discover flooring issues after experiencing problems discussed in Can You Put a Golf Hitting Mat Directly on Concrete?
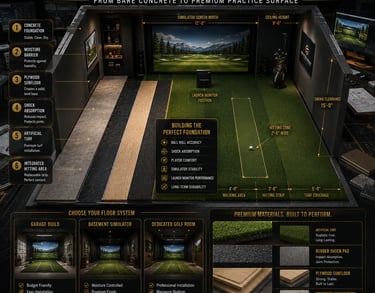
Choosing the Best Materials for Your DIY Floor
In most home installs, you’re looking for something affordable, durable, and easy to maintain.
Artificial Turf
A high-quality, low-pile turf over a firm plywood base is a favorite among installers. It mimics a natural lie, allows decent ball roll, and is easy to clean. Make sure it’s turf designed for golf, not just landscaping, so it doesn’t wear unevenly.
Plywood Base
This is your go-to subfloor material. A flat plywood base ensures stability and prevents bumps that throw off tracking. Use at least 3/4-inch thick plywood, preferably sealed or treated against moisture, especially in basements or garages.
Rubber Mats
Rubber offers shock absorption, which is good for reducing joint stress. However, too thick or soft rubber mats can make ball roll inconsistent. I’ve seen setups where the mat’s softness caused ball sit-up or roll irregularities, throwing off the shot repeatability.
Interlocking Foam Tiles
These are tempting for comfort and easy installation, but beware—the foam compresses underfoot over time and ruins consistency. I only recommend foam tiles as a secondary layer under turf or matting, never as the main surface.
Carpet with Underlay
Some use indoor-outdoor carpet with a thin underlay for budget builds. It works but expect limited ball roll realism and increased wear over time.
Preparing Your Space and Subfloor
What I’ve learned from real installs is that no matter how good your material choice is, a crooked or uneven floor will ruin your results. Always start with a level subfloor. Use a long level or laser level to check for dips or high spots.
If your subfloor is concrete, check for moisture issues and cracks. Consider a moisture barrier or sealing coat before installing plywood or turf. For wooden floors, ensure stability—loose floorboards or creaking will drive you nuts mid-swing.
Clear your intended space completely. The footprint for most home simulators is around 10 feet wide by 15 feet deep, but always verify with your hardware specs. Leave extra room around the hitting area for movement and safety.
Golfers planning to use a hitting strip system should also consider where the strip will be installed and how it will integrate with the surrounding floor.
Installation Steps: From Base to Finish
1. Level Your Subfloor
Correct any unevenness with compounds or sanding. A solid, flat surface is non-negotiable.
2. Lay Plywood Sheets
If you’re adding a plywood base, secure sheets properly with screws and seal edges if moisture is a concern.
3. Add a Shock-Absorbing Layer (Optional)
Place a thin rubber mat or closed-cell foam pad on top of the plywood to soften impact slightly. Keep this layer thin (around 1/4 inch) so it doesn’t disrupt ball tracking.
Golfers concerned about comfort should also review Do Golf Hitting Mats Cause Wrist and Elbow Pain? and Do Golf Hitting Strips Reduce Joint Pain?
4. Install Your Playing Surface
Lay your artificial turf or golf mat over the base, securing edges with double-sided tape or staples. Make sure it’s tight and wrinkle-free. If using rubber or foam tiles, interlock them carefully and check for consistent height.
If you're still deciding on a hitting surface, compare Best Golf Simulator Hitting Mats and Best Golf Simulator Hitting Strips before installation.
5. Final Checks
Confirm the floor is stable, flat, and supportive by standing and swinging in the space. Roll golf balls and check tracking accuracy on your simulator. Adjust if necessary.
Shock Absorption and Comfort Considerations
Shock absorption matters more than some golfers realize, especially if you plan on long sessions or have previous joint issues. What I recommend based on decades of installs is a firm floor with a thin shock-absorbing layer underneath your turf or mat. Too much cushioning and you’ll lose balance and ball roll accuracy; too little and your knees and ankles will pay for it.
A well-chosen rubber underlayer or shock pad reduces impact stress without compromising firmness. Avoid thick foam mats or carpet padding as your primary floor—they’ll compress unevenly and interfere with ball tracking.
Many modern simulator builders combine shock pads with hitting strips because of the benefits outlined in Why Are Golfers Switching to Hitting Strips?
Maintenance Tips for Longevity
Keep your floor in top shape by:
Cleaning turf regularly with a vacuum or brush to remove debris and keep fibers upright.
Wiping down rubber mats to prevent dust buildup and slipping hazards.
Inspecting for tears or loose sections and repairing immediately to avoid trip hazards.
Avoiding excessive moisture or spills that can damage layers underneath.
Rotating or shifting mats periodically to distribute wear evenly.
For long-term durability, it's also worth understanding How Long Do Golf Simulator Hitting Mats Last?
Common Mistakes to Avoid
I’ve seen setups fail when these mistakes happen:
Using flooring that’s either too soft or too hard, messing with ball roll or player stability.
Neglecting to level and prep the subfloor before laying materials.
Underestimating the space needed for ease of movement and swing clearance.
Overlooking shock absorption leading to player discomfort and hardware wear.
Choosing materials that are hard to clean or maintain indoors.
Ignoring compatibility with your specific simulator model and sensors.
Getting these right upfront saves frustration and extra costs down the road.
Upgrading and Customizing Your Simulator Floor
One benefit of DIY floors is you can customize and upgrade as your needs evolve. Consider modular flooring options like interlocking tiles or roll-out mats if you expect to relocate or want to swap materials easily.
Also, you can add alignment guides or markings on turf to help with training and setup precision. For more serious players, layering firm turf over a quality plywood base with a rubber shock pad has consistently delivered the best all-around experience.
Golfers considering replaceable hitting sections should also compare Golf Simulator Hitting Mat vs Hitting Strip and Are Golf Hitting Strips Better Than Full Mats?
FAQ
What materials work best for DIY golf simulator floors?
Artificial turf over plywood with a thin rubber or foam shock pad offers the best mix of durability, ball roll accuracy, and comfort.
How do I prepare my subfloor before installing a golf simulator floor?
Ensure your subfloor is level, stable, dry, and free of debris. Use leveling compounds if necessary and install a moisture barrier for concrete floors.
Can I install a golf simulator floor in a garage or basement?
Yes. Just be mindful of moisture and temperature extremes. Concrete floors in garages often need a moisture barrier and careful sealing.
What is the best way to ensure proper ball roll on my simulator floor?
Choose firm, low-pile turf designed for golf and ensure it’s installed over a flat, stable subfloor without excessive cushioning.
How important is shock absorption in a golf simulator floor?
Very important for reducing joint stress and swing fatigue, but it should be balanced so ball roll and user stability remain accurate.
Are modular flooring options better than permanent installations?
They offer flexibility and ease of upgrades but might not be as stable or firm as permanent plywood-based floors.
How much space do I need for a golf simulator floor?
Generally, a minimum of 10 feet wide by 15 feet deep with extra room around for swings and hardware clearance.
Can I install the floor myself without professional help?
Absolutely. With proper planning and attention to leveling and materials, most DIY installers can successfully build their simulator floors.
Conclusion
Building a DIY golf simulator floor is often the difference between a frustrating, unusable setup and one that performs like a pro-level system. From real-world installs I’ve done and seen, the secrets lie in solid subfloor prep, the right combination of firmness and shock absorption, and choosing materials that handle wear, moisture, and ball roll well.
If you're planning a complete simulator build, spend some time reviewing Best Golf Simulator Hitting Strips, and Golf Simulator Hitting Mat vs Hitting Strip to ensure your flooring works with the rest of your setup.
Keeping your floor flat, stable, and comfortable protects your investment and enhances your practice effectiveness. With careful planning and attention to detail, you can create a durable golf simulator floor that delivers realistic play, joint comfort, and years of enjoyment. This isn’t theory—it’s what works when you’re standing in the room swinging a club every day.
© 2026 GolfTechBuzz. All rights reserved.
Golf Tech Buzz
Performance Through Data
Practical guides, real-world setups, and unbiased comparisons for golfers building smarter practice environments.
General Inquiries: